

Dt. Natasha Mohan
Dietitian Natasha Mohan is one of the most influential and renowned nutritionist and dietitian, with over 3 Million Followers on YouTube and 200+ Million Views and with 10+ Years of Experience. Dietitian Natasha Mohan is a transformation expert, Motivational Speaker and Lifestyle Expert. She has touched million of lives. She specializes in Therapeutic Diets Like, PCOS/PCOD, Thyroid, Diabetes, Cholesterol, Blood pressure, and other lifestyle disorder.
Table of Contents
5 Healthy Indian Dinner Recipes for Quick weight loss
Dinner plays a crucial role in your weight loss journey, as it impacts how well you sleep, your metabolism, and your overall health. A well-balanced dinner helps regulate blood sugar levels, curbs late-night cravings, and ensures you wake up refreshed and energized. Consuming a light, nutritious meal in the evening can prevent overeating and aid in digestion. It’s essential to focus on portion control and include a mix of proteins, vegetables, and whole grains. For personalized guidance on crafting a weight loss-friendly dinner plan, consulting the best dietitian in Delhi can provide you with expert advice tailored to your needs.
dinner recipe 1
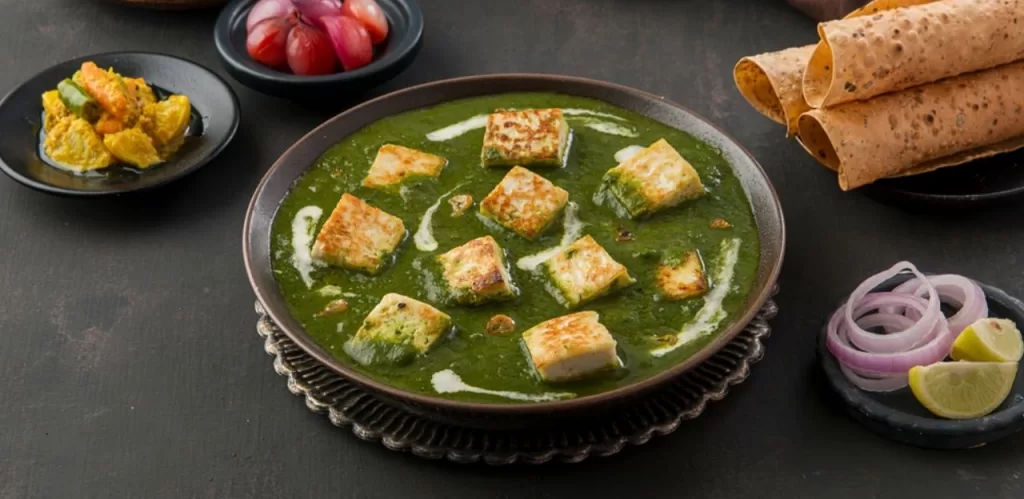
Palak (Spinach) and Paneer Stir-Fry
Ingredients
To create a delectable Palak and Paneer Stir-Fry, you’ll need the following ingredients:
- For the Stir-Fry:
- 250 grams of fresh spinach leaves (palak)
- 200 grams of paneer (Indian cottage cheese), cubed
- 1 large onion, finely chopped
- 2 cloves of garlic, minced
- 1-inch piece of ginger, grated
- 1-2 green chilies, slit (adjust to taste)
- 2 tablespoons of cooking oil (e.g., vegetable or olive oil)
- 1 teaspoon of cumin seeds
- 1 teaspoon of coriander powder
- 1 teaspoon of turmeric powder
- 1 teaspoon of garam masala
- Salt to taste
- Freshly ground black pepper to taste
For Garnishing (optional):
- A squeeze of lemon juice
- Fresh coriander leaves, chopped
Preparation Steps
Preparing the Paneer
Cube the Paneer: Start by cutting the paneer into bite-sized cubes. If you prefer, you can lightly fry the paneer cubes in a little oil until they turn golden brown. This step adds a nice texture to the paneer but is optional.
Marinate (optional): For extra flavor, you can marinate the paneer cubes in a mixture of yogurt and spices for about 30 minutes before cooking.
Preparing the Spinach
Wash the Spinach: Rinse the spinach leaves thoroughly under cold water to remove any dirt or grit.
Blanch the Spinach: In a large pot, bring water to a boil and add a pinch of salt. Add the spinach leaves to the boiling water for about 2 minutes until they wilt.
Cool and Blend: Drain the spinach and transfer it to a bowl of ice water to stop the cooking process. After a few minutes, drain the spinach again and squeeze out excess water. Blend the spinach into a smooth puree using a blender or food processor.
Sautéing the Ingredients
Heat the Oil: In a large skillet or frying pan, heat the cooking oil over medium heat.
Sauté the Aromatics: Add cumin seeds to the hot oil and let them sizzle for a few seconds. Then, add the chopped onions, minced garlic, grated ginger, and green chilies. Sauté until the onions turn translucent and the mixture is fragrant.
Cook the Spices: Add the coriander powder, turmeric powder, and salt. Stir for a minute to cook the spices.
Cooking Instructions
Heating the Pan
- Preheat the Skillet: Ensure your skillet is well-heated before adding ingredients. This helps in even cooking and enhances the flavors.
Cooking the Spinach
Add Spinach Puree: Pour the spinach puree into the skillet. Stir well to combine with the sautéed onions and spices.
Simmer: Let the spinach mixture cook for about 5-7 minutes on medium heat until it thickens and the flavors meld together.
Adding the Paneer
Add Paneer Cubes: Gently fold in the paneer cubes, ensuring they are well coated with the spinach mixture.
Cook Together: Let the paneer and spinach cook together for another 5 minutes. Stir occasionally to prevent sticking and to ensure even cooking.
Adding Spices and Seasoning
Adjust Seasoning: Add garam masala, freshly ground black pepper, and adjust salt to taste. Stir well to incorporate the spices.
Simmer: Allow the dish to simmer for another 2-3 minutes, giving the paneer time to absorb the flavors.
Serving Suggestions
Garnish: Before serving, you can garnish the dish with a squeeze of lemon juice and chopped coriander leaves for added freshness.
Accompaniments: Palak and Paneer Stir-Fry pairs wonderfully with roti, paratha, or steamed rice.
Storage Tips
Refrigeration: Store any leftovers in an airtight container in the refrigerator for up to 3-4 days.
Reheating: Reheat in a pan over low heat, adding a splash of water if needed to loosen the consistency.
Health Benefits
Nutrient-Rich: Spinach is rich in vitamins A, C, and K, as well as iron and calcium. Paneer provides a good source of protein and calcium, making this dish both nutritious and satisfying.
Digestive Health: Spinach is high in fiber, which aids in digestion and helps maintain a healthy digestive system.
Conclusion
Incorporating Palak (Spinach) and Paneer Stir-Fry into your diet is a delicious way to enjoy a nutritious and satisfying meal. This dish not only provides a burst of flavor but also delivers essential nutrients that contribute to overall well-being. For those looking to make healthy dietary choices or seeking personalized weight loss guidance, consulting the Best Online Dietitian For Weight Loss India can be incredibly beneficial. With expert advice and a tailored approach, you can achieve your health goals while savoring delightful recipes like this one.
Dinner Recipe 2
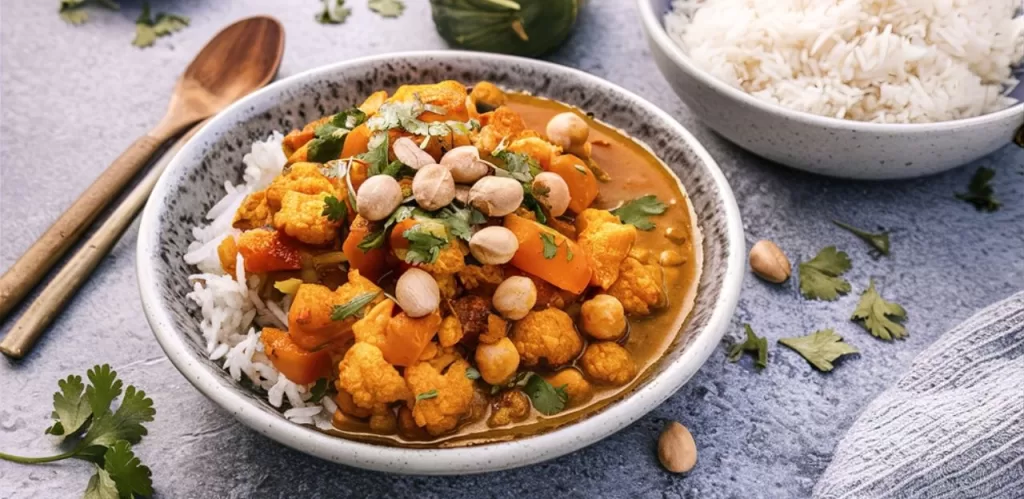
Chickpea and Vegetable Curry
Chickpea and vegetable curry is a hearty and flavorful dish that’s both nourishing and satisfying. Packed with protein-rich chickpeas and a medley of colorful vegetables, this curry is perfect for a wholesome meal. Whether you’re a seasoned cook or just getting started, this recipe will guide you through each step to create a delicious and balanced curry.
Ingredients
For the Curry:
- 1 cup dried chickpeas (or 2 cans of chickpeas, drained and rinsed)
- 1 large onion, finely chopped
- 2 cloves garlic, minced
- 1-inch piece of ginger, grated
- 1 large tomato, diced
- 1 cup cauliflower florets
- 1 cup carrots, diced
- 1 cup green peas (fresh or frozen)
- 1 bell pepper (any color), diced
- 2 tablespoons cooking oil (e.g., vegetable or olive oil)
- 1 teaspoon cumin seeds
- 1 teaspoon turmeric powder
- 1 teaspoon ground coriander
- 1 teaspoon garam masala
- 1 teaspoon paprika
- 1 teaspoon chili powder (adjust to taste)
- 1 can (400 ml) coconut milk
- 1 cup vegetable or chicken broth
- Salt to taste
- Fresh cilantro, chopped (for garnish)
For Garnishing (optional):
- A squeeze of lemon or lime juice
- Additional cilantro leaves
Preparation Steps
Preparing the Chickpeas
Soaking (for dried chickpeas): If using dried chickpeas, soak them overnight in plenty of water. This helps soften them and reduces cooking time.
Cooking the Chickpeas: Drain the soaked chickpeas and transfer them to a large pot. Cover with fresh water and bring to a boil. Simmer for 1-1.5 hours, or until tender. Alternatively, use a pressure cooker to speed up the process. If using canned chickpeas, simply drain and rinse them.
Preparing the Vegetables
Chop and Dice: Dice the onion, garlic, ginger, tomato, bell pepper, and other vegetables as indicated in the ingredients list.
Blanch the Vegetables (optional): For vegetables like cauliflower and carrots, blanching can help retain their color and crunch. Boil them for a few minutes and then immediately place them in ice water.
Cooking Instructions
Heating the Pan
- Preheat the Skillet: Place a large skillet or pot on medium heat and add the cooking oil.
Sautéing the Aromatics
Add Cumin Seeds: Once the oil is hot, add cumin seeds and let them sizzle for about 30 seconds until they release their aroma.
Sauté Onions, Garlic, and Ginger: Add the finely chopped onions, minced garlic, and grated ginger to the skillet. Sauté until the onions become translucent and the mixture is fragrant, about 5 minutes.
Cooking the Vegetables
Add Tomatoes: Stir in the diced tomatoes and cook until they soften and break down, about 3-4 minutes.
Add Vegetables: Add the cauliflower, carrots, bell pepper, and green peas to the skillet. Stir well to combine with the tomato mixture.
Add Spices: Sprinkle turmeric powder, ground coriander, garam masala, paprika, and chili powder over the vegetables. Stir to coat evenly and cook for 2 minutes to let the spices bloom.
Incorporating the Chickpeas and Liquid
Add Chickpeas: Stir in the cooked or canned chickpeas, ensuring they are well mixed with the vegetables and spices.
Add Coconut Milk and Broth: Pour in the coconut milk and vegetable or chicken broth. Stir well and bring to a gentle simmer.
Simmering the Curry
Simmer: Allow the curry to simmer for 15-20 minutes, or until the vegetables are tender and the flavors have melded together. Stir occasionally to prevent sticking.
Adjust Consistency: If the curry is too thick, add a bit more broth or water to reach your desired consistency. If too thin, simmer a bit longer to thicken.
Finishing Touches
Season to Taste: Taste the curry and adjust seasoning with salt and additional spices if needed.
Garnish: Before serving, garnish with chopped fresh cilantro and a squeeze of lemon or lime juice for added brightness.
Serving Suggestions
Serve Hot: Serve the chickpea and vegetable curry hot with steamed rice, naan bread, or pita.
Accompaniments: This curry pairs well with a side of yogurt or raita to balance the flavors.
Health Benefits
Nutritious: Chickpeas are a great source of protein and fiber, while vegetables provide essential vitamins and minerals. Coconut milk adds a creamy texture and healthy fats.
Digestive Health: The fiber in chickpeas and vegetables supports healthy digestion and can aid in weight management.
Conclusion
Chickpea and vegetable curry is a delightful and nutritious addition to your meal repertoire, offering a blend of rich flavors and health benefits. Its combination of protein-packed chickpeas and vibrant vegetables makes it a filling and wholesome dish. For personalized dietary advice and to achieve your weight loss goals, consulting the Best Nutritionist For Weight Loss can provide tailored guidance and support. Enjoy this delicious curry as part of a balanced diet and benefit from expert advice to enhance your overall wellness.
dinner Recipe 3
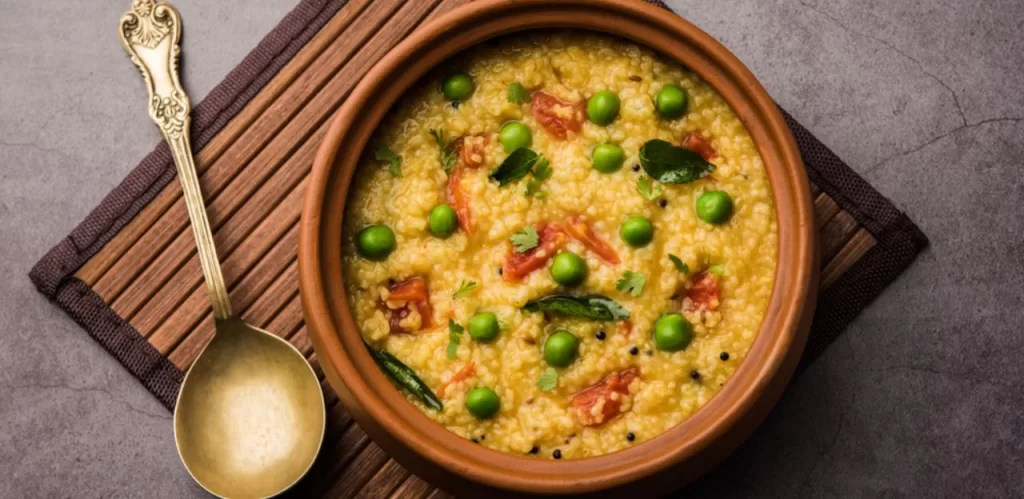
Vegetable Khichdi
Vegetable Khichdi is a comforting, one-pot dish that combines rice, lentils, and a variety of vegetables. It’s a staple in many Indian households, celebrated for its simplicity and nutritional benefits. This dish is perfect for a quick, wholesome meal that’s both satisfying and easy on the digestive system.
Ingredients
For the Khichdi:
- 1 cup rice
- 1/2 cup split yellow moong dal (lentils)
- 1 medium potato, diced
- 1 cup carrots, diced
- 1 cup green beans, chopped
- 1 cup peas (fresh or frozen)
- 1 large onion, finely chopped
- 2 cloves garlic, minced
- 1-inch piece of ginger, grated
- 1 tomato, diced
- 1-2 green chilies, slit (adjust to taste)
- 1 teaspoon cumin seeds
- 1/2 teaspoon turmeric powder
- 1/2 teaspoon ground coriander
- 1/2 teaspoon garam masala
- 1/2 teaspoon mustard seeds (optional)
- 2 tablespoons cooking oil or ghee
- 4 cups water or vegetable broth
- Salt to taste
- Fresh cilantro, chopped (for garnish)
For Garnishing (optional):
- A dollop of yogurt
- Lemon wedges
Preparation Steps
Preparing the Ingredients
Rinse the Rice and Dal: Wash the rice and moong dal under cold running water until the water runs clear. Soak them together in water for about 15-20 minutes to soften. Drain and set aside.
Chop Vegetables: Dice the potato, carrots, and onion. Chop the green beans and tomato. Mince the garlic and grate the ginger.
Cooking Instructions
Heating the Pan
- Preheat the Pan: Place a large pot or pressure cooker on medium heat and add the cooking oil or ghee.
Tempering the Spices
Add Mustard Seeds (if using): Once the oil is hot, add mustard seeds. Let them splutter for a few seconds.
Add Cumin Seeds: Add cumin seeds and let them sizzle for about 30 seconds.
Cooking the Vegetables
Add Tomatoes: Stir in the diced tomatoes and cook until they break down and blend into the mixture, about 3-4 minutes.
Add Vegetables: Add the diced potato, carrots, green beans, and peas. Stir well to mix with the spices.
Adding Rice and Dal
- Combine Rice and Dal: Add the drained rice and moong dal to the pot. Stir to combine with the vegetables and spices.
Adding Spices and Liquid
Add Spices: Sprinkle turmeric powder, ground coriander, and salt over the mixture. Stir to evenly coat the ingredients.
Add Water or Broth: Pour in 4 cups of water or vegetable broth. Stir well and bring to a boil.
Simmering the Khichdi
Simmer: Reduce the heat to low, cover the pot, and let the khichdi simmer for about 20-25 minutes, or until the rice and dal are cooked and the vegetables are tender. If using a pressure cooker, cook for 2-3 whistles.
Check Consistency: The khichdi should have a slightly porridge-like consistency. If it’s too thick, add a bit more water and stir. If too watery, simmer uncovered until it reaches your desired consistency.
Finishing Touches
Add Garam Masala: Once the khichdi is cooked, stir in the garam masala for added flavor.
Garnish: Garnish with freshly chopped cilantro. You can also serve with a dollop of yogurt and lemon wedges on the side if desired.
Health Benefits
Nutritious: Khichdi is a balanced meal with proteins, fiber, and essential nutrients from the vegetables. It’s gentle on the digestive system and ideal for those recovering from illness or looking for a light meal.
Digestive Health: The combination of rice and lentils aids in digestion and provides a good source of energy.
Conclusion
Vegetable Khichdi is a wholesome and nutritious meal that combines the goodness of rice, lentils, and vegetables into a comforting dish. It’s not only easy to prepare but also provides a balanced mix of nutrients that support overall health. For personalized dietary advice and to achieve your health goals, consulting the best online Nutritionist in India can offer tailored guidance and support. Enjoy this delicious khichdi as part of your healthy eating plan and benefit from expert nutritional insights.
Dinner Recipe 4
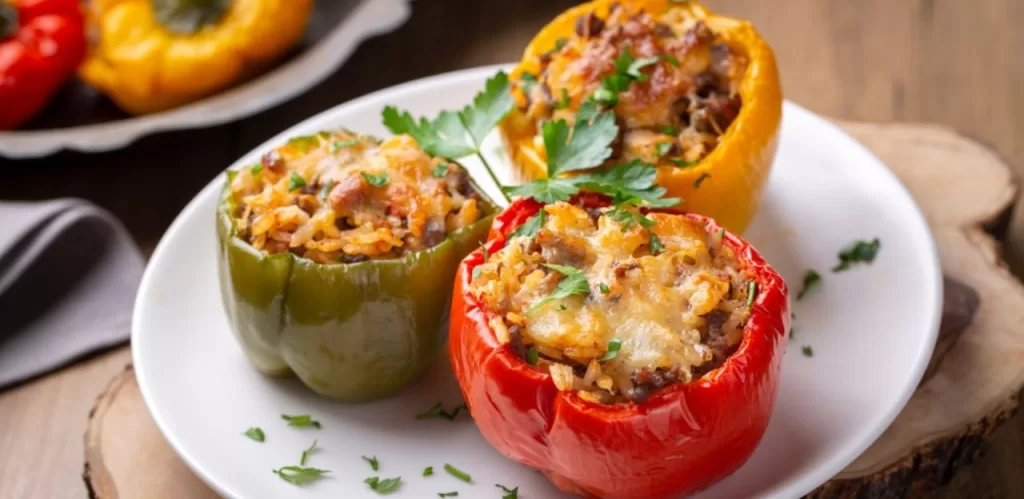
Stuffed Bell Peppers
Stuffed bell peppers are a versatile and satisfying dish that can be customized to suit various tastes and dietary needs. Filled with a savory mixture of rice, vegetables, and spices, these peppers make a colorful and nutritious meal. Whether you’re serving them for dinner or as a special side dish, this recipe will guide you through the process of creating perfectly stuffed bell peppers.
Ingredients
For the Stuffed Bell Peppers:
- 4 large bell peppers (any color)
- 1 cup cooked rice (white or brown)
- 1/2 cup cooked ground meat (beef, turkey, or chicken) or a plant-based alternative
- 1 medium onion, finely chopped
- 2 cloves garlic, minced
- 1 cup diced tomatoes (fresh or canned)
- 1 cup corn kernels (fresh, frozen, or canned)
- 1 cup black beans, drained and rinsed (optional)
- 1 teaspoon cumin powder
- 1 teaspoon paprika
- 1/2 teaspoon dried oregano
- 1/2 teaspoon chili powder (adjust to taste)
- 1/2 cup shredded cheese (cheddar, mozzarella, or a dairy-free alternative)
- 2 tablespoons olive oil
- Salt and pepper to taste
- Fresh cilantro or parsley, chopped (for garnish)
For the Topping (optional):
- Additional shredded cheese
- Fresh herbs for garnish
Preparation Steps
Preparing the Bell Peppers
Preheat the Oven: Preheat your oven to 375°F (190°C).
Prepare the Peppers: Wash the bell peppers and cut off the tops. Carefully remove the seeds and membranes from inside, making sure not to tear the pepper. Set aside.
Preparing the Filling
Cook the Meat (if using): If using ground meat, cook it in a skillet over medium heat until browned and fully cooked. Drain any excess fat and set aside.
Sauté the Vegetables: In a large skillet, heat the olive oil over medium heat. Add the chopped onions and cook until they become translucent, about 5 minutes.
Add Garlic and Tomatoes: Stir in the minced garlic and cook for 1 minute. Then add the diced tomatoes and cook for an additional 3-4 minutes until the tomatoes start to break down.
Add Corn and Beans: Mix in the corn kernels and black beans (if using). Stir well and cook for another 2 minutes.
Season the Mixture: Add the cumin powder, paprika, dried oregano, chili powder, salt, and pepper to the skillet. Stir to combine and cook for an additional 2 minutes.
Combine with Rice and Meat: Stir in the cooked rice and the cooked ground meat (if using). Mix thoroughly and cook for a few more minutes to ensure everything is heated through.
Add Cheese: Remove the skillet from heat and stir in half of the shredded cheese.
Stuffing the Peppers
Fill the Peppers: Spoon the rice and meat mixture into each bell pepper, packing it in gently but firmly.
Top with Cheese: If desired, sprinkle additional shredded cheese on top of each stuffed pepper.
Baking the Peppers
Arrange in a Baking Dish: Place the stuffed peppers upright in a baking dish. If needed, you can cut a small slice from the bottom of each pepper to help them stand upright.
Cover and Bake: Cover the baking dish with aluminum foil and bake in the preheated oven for 25-30 minutes.
Uncover and Bake: Remove the foil and bake for an additional 10-15 minutes, or until the peppers are tender and the cheese is melted and bubbly.
Finishing Touches
Garnish: Remove the peppers from the oven and let them cool slightly. Garnish with freshly chopped cilantro or parsley before serving.
Serve: Serve the stuffed bell peppers hot, either on their own or with a side of salad or bread.
Storage Tips
Refrigeration: Store leftover stuffed peppers in an airtight container in the refrigerator for up to 3-4 days.
Freezing: You can freeze stuffed peppers for up to 3 months. To reheat, thaw in the refrigerator overnight and bake at 375°F (190°C) until heated through.
Health Benefits
Nutrient-Rich: Bell peppers are packed with vitamins A and C, antioxidants, and fiber. When combined with rice, meat, and vegetables, they offer a balanced and nutritious meal.
Versatile: This recipe can be easily adapted for different dietary needs, including vegetarian, vegan, or gluten-free options.
Conclusion
Stuffed bell peppers are a delightful and nutritious dish, combining a variety of flavors and ingredients into a healthy, satisfying meal. Their versatility allows for customization to fit different dietary needs and preferences. For personalized dietary guidance and expert advice on maintaining a balanced diet, consulting famous dietitians in India can provide valuable insights. Enjoy this vibrant dish as part of a wholesome eating plan and benefit from professional nutritional support.
Dinner Recipe 5
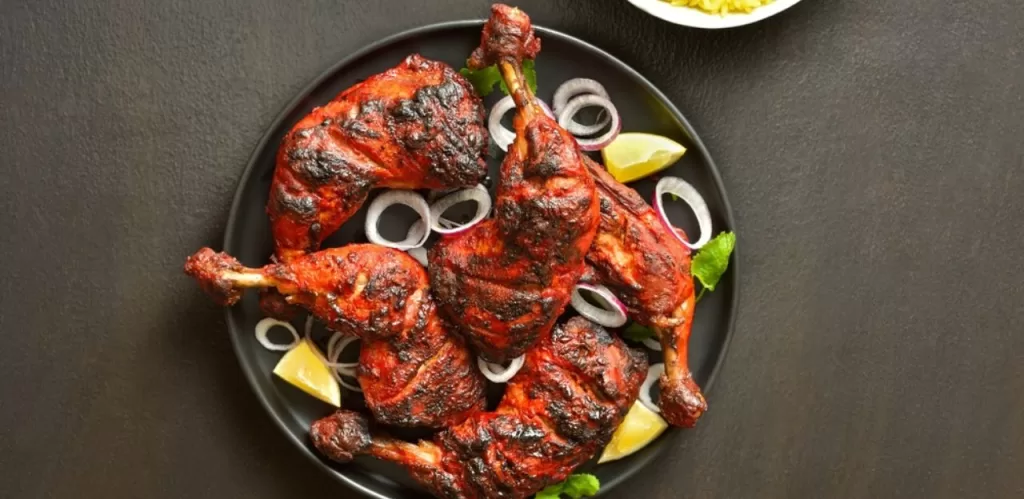
Tandoori Chicken
Tandoori chicken is a classic Indian dish known for its vibrant spices, smoky flavor, and tender texture. Traditionally cooked in a tandoor (a clay oven), this recipe will guide you through preparing tandoori chicken using a regular oven or grill. With a marinade of yogurt and spices, this dish promises to be a hit at your next meal.
Ingredients
For the Marinade:
- 1 cup plain Greek yogurt (or regular yogurt)
- 2 tablespoons lemon juice
- 2 tablespoons vegetable oil
- 2 tablespoons tandoori masala (store-bought or homemade)
- 1 tablespoon ground cumin
- 1 tablespoon ground coriander
- 1 tablespoon paprika
- 1 teaspoon ground turmeric
- 1 teaspoon garam masala
- 1 teaspoon ground cayenne pepper (adjust to taste)
- 1 teaspoon ground black pepper
- 1 teaspoon salt (or to taste)
- 3-4 cloves garlic, minced
- 1-inch piece of fresh ginger, grated
For the Chicken:
- 4 bone-in, skinless chicken thighs
- 4 bone-in, skinless chicken drumsticks
For Garnish (optional):
- Fresh cilantro, chopped
- Lemon wedges
- Sliced onions
Preparation Steps
Prepare the Chicken
- Clean the Chicken: Rinse the chicken pieces under cold water and pat them dry with paper towels. Make several deep cuts or slashes in the chicken pieces to allow the marinade to penetrate and flavor the meat.
Make the Marinade
Combine Ingredients: In a large bowl, combine 1 cup of plain yogurt, 2 tablespoons of lemon juice, and 2 tablespoons of vegetable oil.
Add Spices: Stir in 2 tablespoons of tandoori masala, 1 tablespoon each of ground cumin, ground coriander, paprika, and garam masala, along with 1 teaspoon each of ground turmeric, cayenne pepper, black pepper, and salt.
Mix in Aromatics: Add 3-4 minced garlic cloves and 1-inch grated piece of fresh ginger to the mixture.
Whisk Together: Mix everything until you have a smooth, well-combined marinade.
Marinate the Chicken
Coat the Chicken: Add the chicken pieces to the bowl with the marinade. Use your hands or a spoon to thoroughly coat each piece with the marinade, ensuring it gets into the cuts.
Refrigerate: Cover the bowl with plastic wrap or a lid and refrigerate for at least 4 hours, preferably overnight. The longer the chicken marinates, the more intense the flavor will be.
Preheat the Oven or Grill
Oven: Preheat your oven to 425°F (220°C). Line a baking sheet with aluminum foil and place a wire rack on top if you have one (this helps the chicken cook evenly and allows excess marinade to drip off).
Grill: Preheat your grill to medium-high heat.
Cook the Chicken
Oven Cooking:
- Arrange on Rack: Place the marinated chicken pieces on the wire rack or directly on the prepared baking sheet if not using a rack.
- Bake: Bake in the preheated oven for 35-40 minutes, or until the chicken is cooked through and the internal temperature reaches 165°F (74°C). For a more charred effect, you can broil the chicken for an additional 2-3 minutes, but keep an eye on it to prevent burning.
Grilling:
- Prepare the Grill: Oil the grill grates to prevent sticking.
- Grill the Chicken: Place the marinated chicken on the grill and cook for 20-25 minutes, turning occasionally, until the chicken is cooked through and has a nice char. Use a meat thermometer to check that the internal temperature has reached 165°F (74°C).
Finish and Serve
Rest the Chicken: Once cooked, let the chicken rest for 5 minutes to allow the juices to redistribute.
Garnish: Garnish with freshly chopped cilantro, lemon wedges, and sliced onions if desired.
Serve: Serve the tandoori chicken hot with naan bread, rice, or a side salad. It pairs beautifully with a cooling cucumber raita or mint chutney.
Health Benefits
Spice Benefits: The spices used in tandoori chicken, such as turmeric and cumin, have anti-inflammatory and antioxidant properties.
Lean Protein: Chicken thighs and drumsticks are good sources of protein, and using yogurt in the marinade helps tenderize the meat while adding a probiotic benefit.
Conclusion
Tandoori chicken is a flavorful and healthful dish, perfect for those seeking a satisfying meal with a touch of Indian cuisine. Its rich spices and tender texture make it a favorite among many. For personalized dietary advice and meal planning to complement your healthy eating habits, consider consulting the best dietitian in Delhi. They can provide tailored guidance to help you achieve your nutritional goals while enjoying delicious dishes like tandoori chicken.

